
Materials needed: plastic wrap, Vaseline, piece of toilet paper, ca. 6-10 rolls of plaster, bucket, sand, Styrofoam head or piece of Styrofoam or styrodur, molding plaster, plastic bowl with water, black marker or soft pencil, gaffer tape, hedge trimmer or old scissors, piece of felt, glue pen
A plaster head with your own individual head size is very helpful for creating headpieces of all kinds for cosplays and costumes. I want to show you how easy it is!
First of all cut your plaster rolls in short pieces (ca. 10-15cm), this is important as preparation. It´s much easier to work with the plaster cast in short pieces, than using the big roll. Also you have to cut a piece of Styrofoam to put it into the head together with the pour plaster to make the head less heavy, I used an old Styrofoam head and cut away the head a bit, otherwise it would not get into the mold (neck = too tight for head) .
I bought the plaster cast rolls on ebay, because it was cheaper. Take care to compare the prices, I bought 12 rolls 8cm x 300cm (10,99€) and I think I have still four left of them, but there are a lot of deals with much smaller rolls. The Styrofoam is easy to get as plate in a local hardware store, mine was 125 x 60 x 5 cm and costs ~6€. The molding plaster was bought on amazon, on the first try I bought 2,5kg and it was way to little, so on my second try I bought 4,5kg and it was nearly perfect to fill the head with the styrofoam in it. It was alabaster molding plaster that dries White and costs 10,90€ for 4,5kilos.
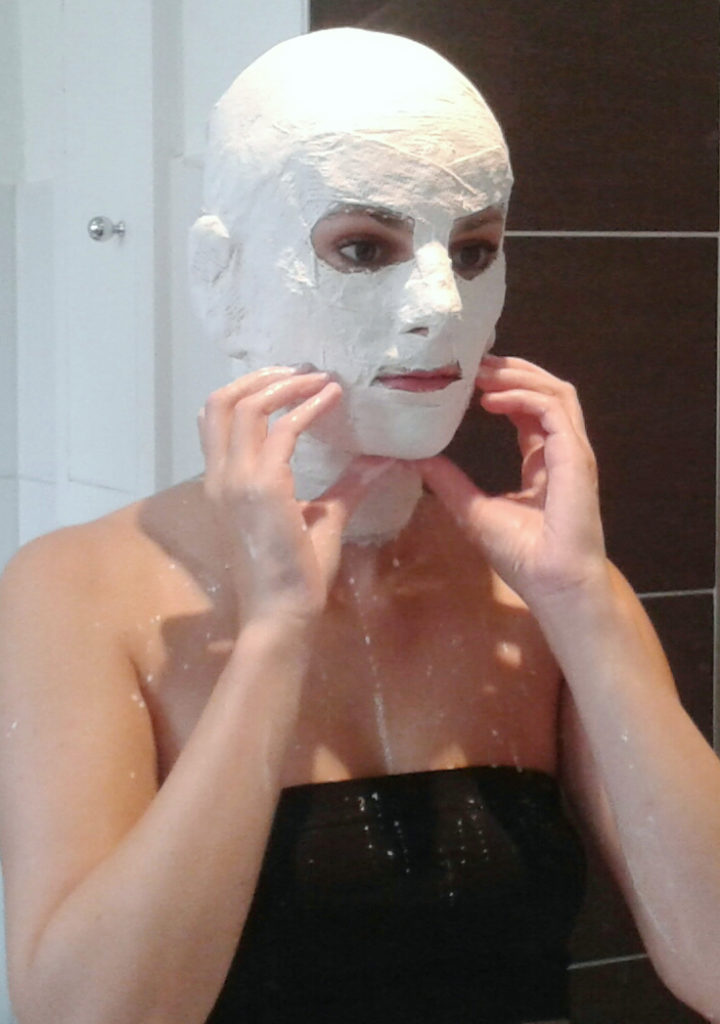
Put on some old clothes or use an old towel to cover them. Drape your hair as close as possible to your head and wrap the back and top of your head in plastic foil (cover your hair completely). Lotion your entire head and neck with Vaseline, otherwise it will be a horror to get the plaster off of your face without making a brazilian face waxing ;-). Believe me, it hurts! I forgot a few small areas and it was evil!
Place a plastic bowl with warm water in front of you, also the plaster cast pieces (because the plaster is given to dry on the ceramic very fast and it doesn´t make fun to remove it later). Dip the pieces of plaster cast shortly into the water and place them on your head.
Please note that you have to make two halves of your head. The easiest way is to make the front a few centimeters behind the ears, and then the back until the ears and attach the two halves later.
The plaster will dry very fast, you need app. 2-3 layers, and pull it off when it dries a bit. You have two options for the eyes area, either add the plaster cast later after you pull the face half off, or you can cover your eyes and eyebrows with a wet piece of cotton rounds and then add the plaster cast blind on it, wait 2 minutes and then pull everything off. Keep the nose holes!! You will need it!
Same procedure with the back of the head. Let both halves dry a bit.
Ben made this photo because it looked “spooky” 😉
For the next step it is good to have a second person to help you.
First put on the front half and then the back half and push them together until they fit well and tight around your head (this is nothing for people with claustrophobia!), the edge of the back half will pull over the edge of the front half. When they fit well, use a black marker or a soft pencil to draw a line beneath the edge. Now you know where you have to attach them on each other. Pull both sides off and then pull them again together until the line you drew. Use leftover plaster to make a nice transition on the inside between both halves and add also some plaster on the outside for more stability. You also have to cover the eye and nose area with plaster now. Keep the neck open! It is possible to make the edges wet and soft again, to get a nicer transition, but be careful! Let everything dry overnight.
Now you have to cover the inside with Vaseline to avoid that the pour plaster will stick to the plaster cast!
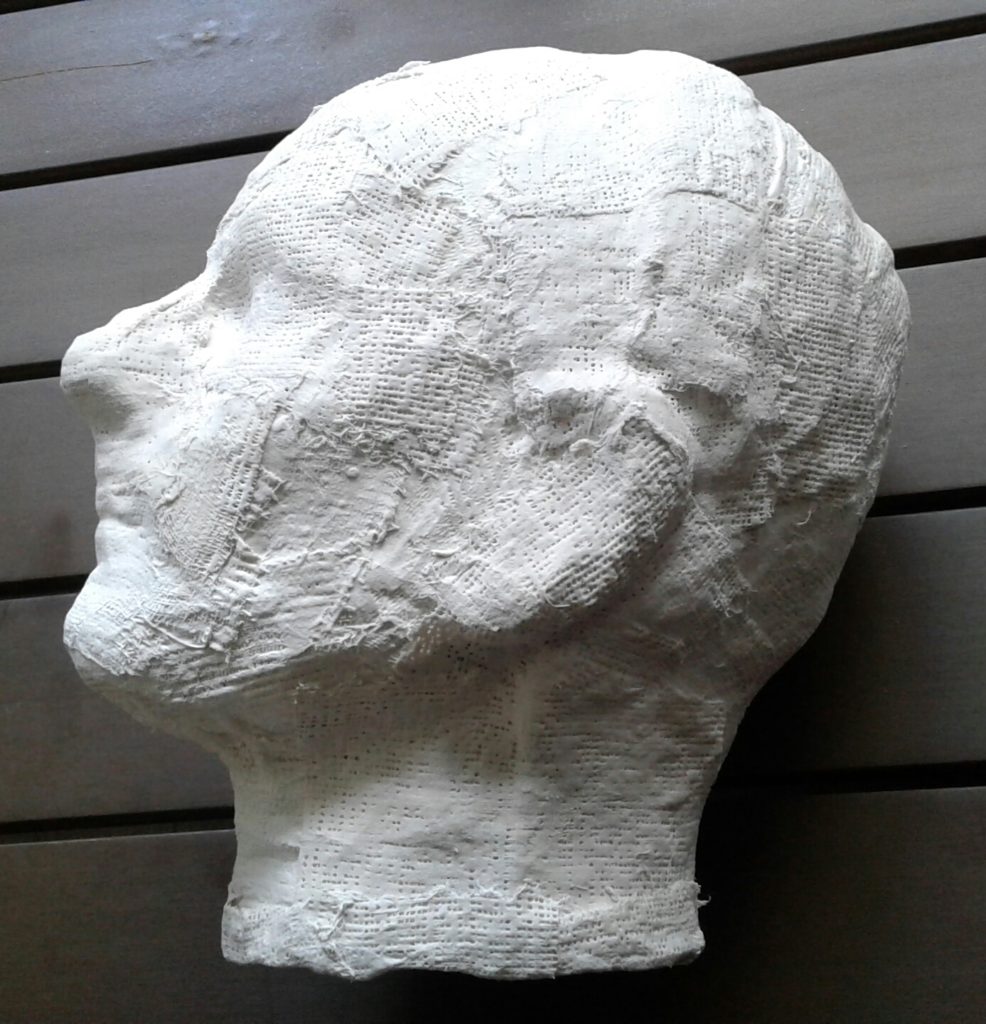
Finished mold
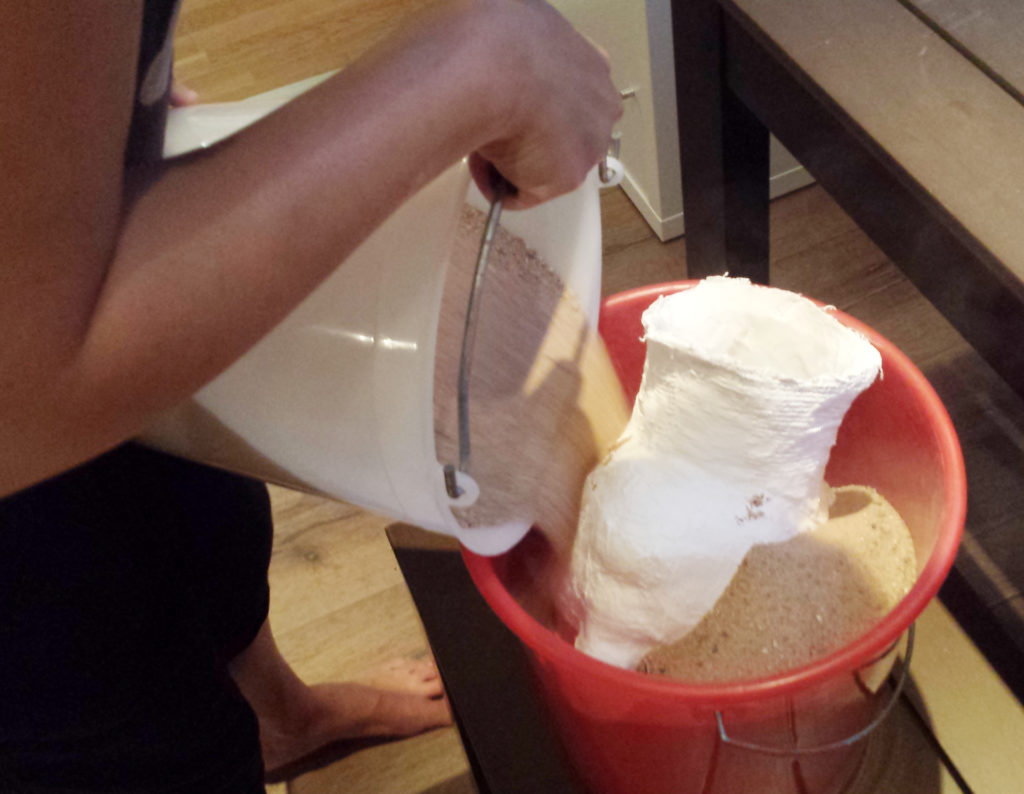
Put in the mold upside down into the bucket (mine was a bit too small, it is better, when the neck opening is horizontal, otherwise you have to adjust the base afterwards. Fill the bucket with sand to avoid the mold breaks. I read some stud about pressure compensation for plaster. I don´t know if it´s really needed for this, but just to make sure nothing will break, I made it!
Mix the molding plaster like given on the description and pour it into the mold then. I needed app. 4,5kg of it for my head, but on my first try, I had not enough plaster to fill the mold completely (only 2,5kg), so half the way it was empty. That was very annoying, because you only can use the mold once, because you will destroy it to get out the head.

When the mold is a third filled, put in the Styrofoam. In case of being much lighter than the plaster, the plaster will try to push the Styrofoam out. Fix the Styrofoam with a piece of gaffer tape onto the bucket to hold it down and fill in the rest of the pour plaster until the mold is filled. Let the plaster dry as given in the description from the seller. I waited 24 hours. Take care to Position the styrofoam centered in the mold, it must not be in contact with the mold itself and should complety locked up with the plaster.

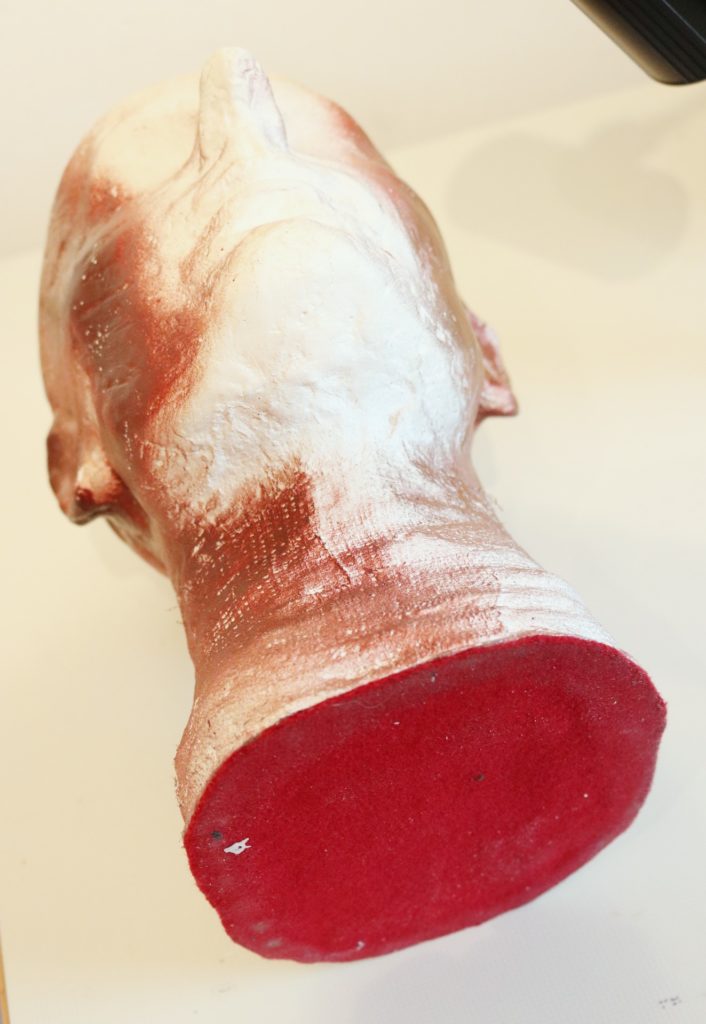
When everything is stable (it will NOT be dry in this phase!), you can remove the mold from the bucket and open it up slowly now. I used a hedge trimmer for that and start at the back neck to avoid destruction in the face. The Vaseline should make it easy to remove everything of the mold when the opening is big enough.
The “skin” of the head is a bit rough, I sanded everything a bit with sanding paper (120) and smooth some edges. You have to check if the head stands straight. In case of a too small bucket, I had to correct mine and add some plaster cast at the neck, also to create a good base.
Now everything has to dry, this took 3 weeks for my plaster head. Normally some information about that is given in the supplier description, like “the plaster dries 1cm per day” or something like that. Keep the head on a dry but well aerated place to avoid mould, but when it happens, you can remove it with sanding paper. Once the head is dried completely, there will never be mould again.
At the end I added a piece of felt below the base to avoid scratches. Place the head on the felt and draw a line around the edge with a marker. Cut it out and glue it below the base with hot glue.
Done!
PS: The head is heat resistant. I often used the hot air gun to mold the worbla over the plaster head :).
PPS: Maybe the surface is not as smooth as if you make a mold with alginate, but much easier to handle and if you´re a bit skillfully, you can make it all alone by yourself.
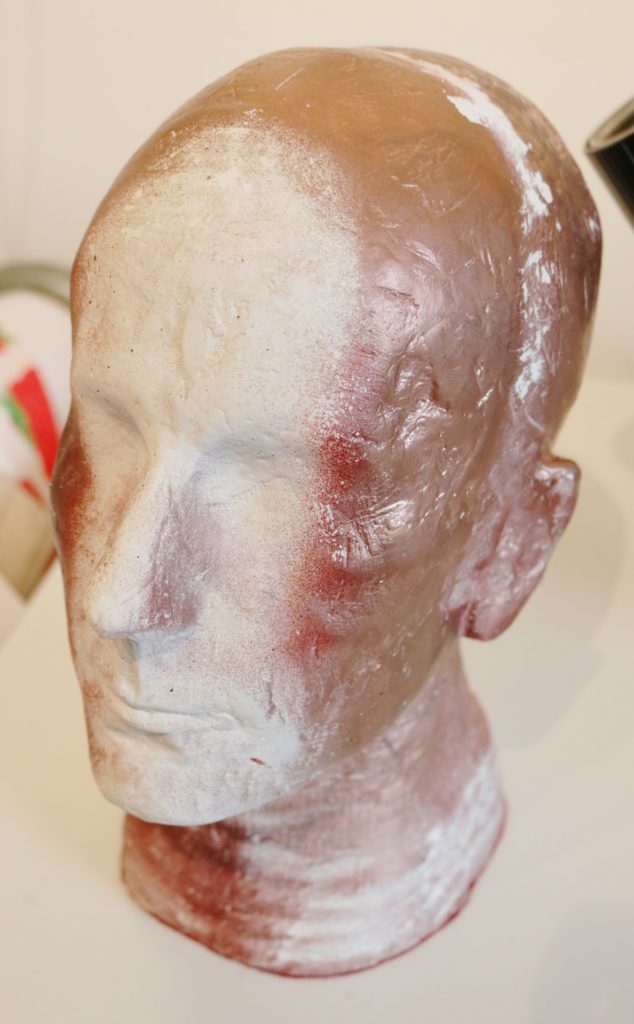
This is the finished plaster head I already used the last months. I did my Hermes headpiece on it and it was sooo helpful to have directly the correct size! 🙂
No Comments