Materials needed: paper + pen, poolnoodle, expanding foam, cardboard, thick thread (wool), Worbla, 3-4 screws, screwdriver, fur (in 2 colours), buckle (metal), strap/leather, craft knives, taylor scissor, pins/safety pins, paper scissor, sewing machine/sewing needle and matching yarn
Optional: cheap fabric, acryl paint (black), metal rings & eyelets for harness
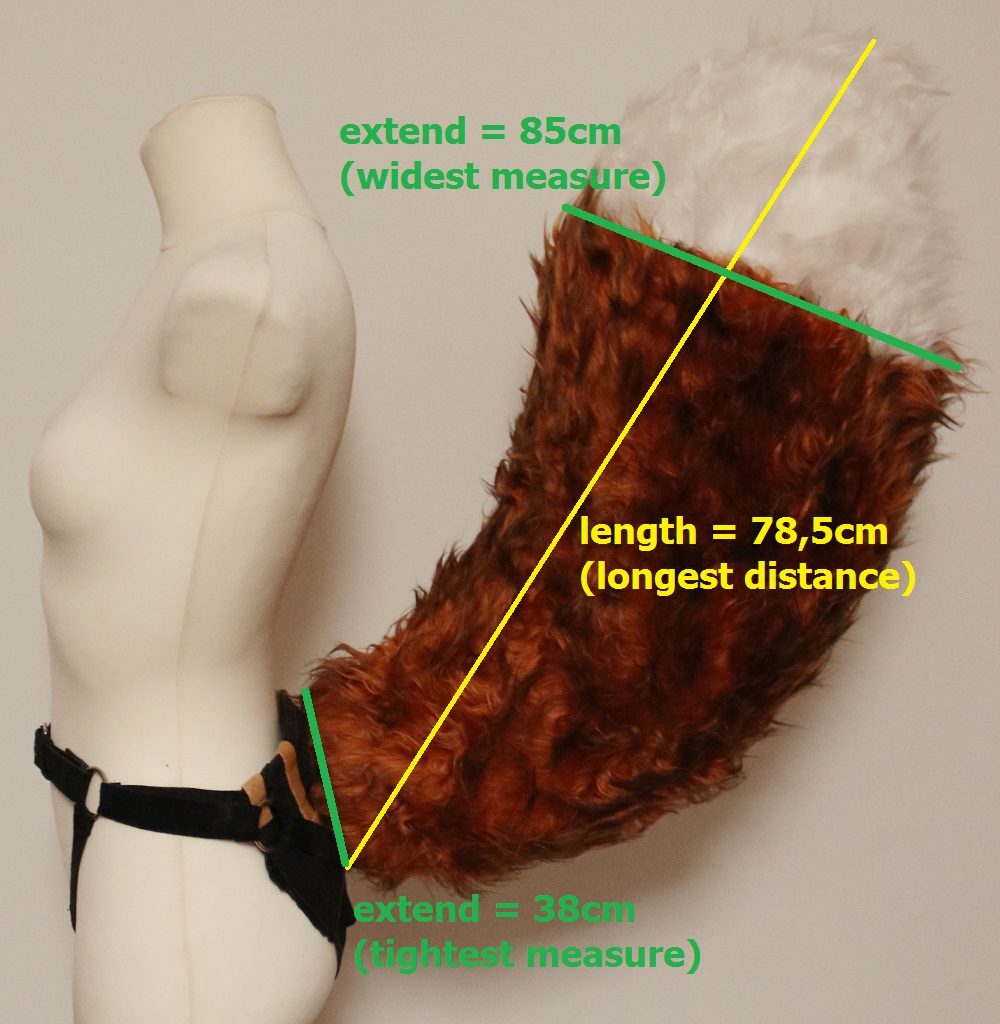
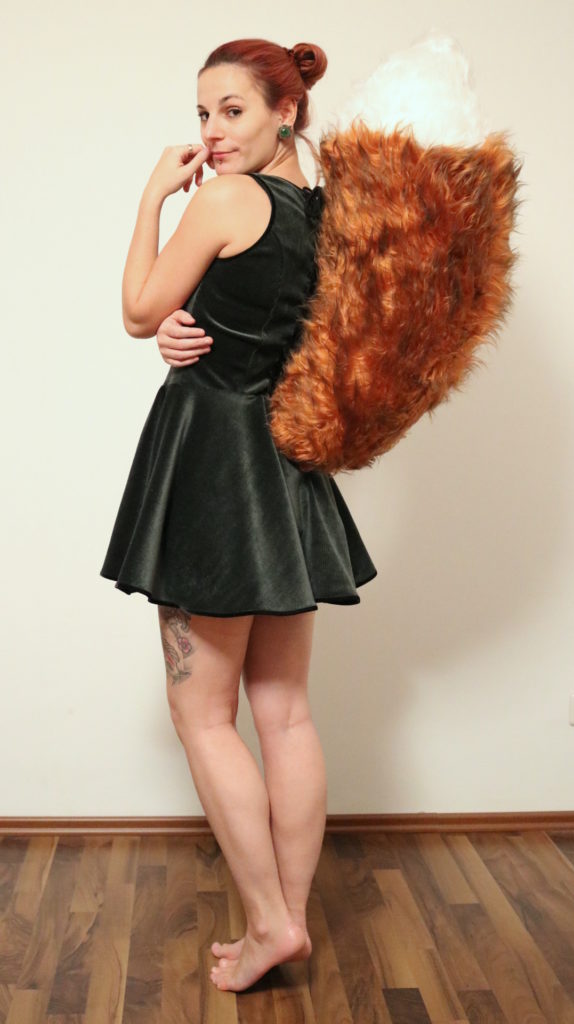
First, you have to think about the length and shape of the tail. The longer and thicker it is, the heavier and more uncomfortable the whole thing will become! My foxtail is 78,5cm long and weights 1090 grams. In the beginning my tail was much bigger than like my version now, I reduce length and volume afterwards, because the proportion was not good and the size made it very heavy and uncomfortable to wear.

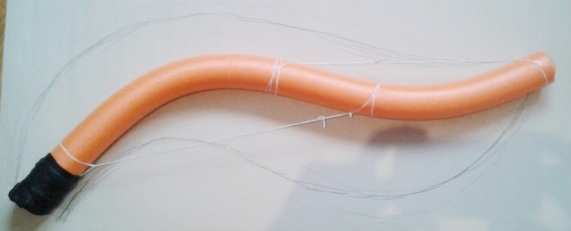
Go get your pool noodle and cut a 0,5-1cm deep groove all around in it, 10cm from one site.

this becomes the end, which will be screwed to the base “butt” plate
This area has to be covered with worbla (you can use leftovers for this!), also in the groove! That´s important to have a stable base, where you can screw in the screws and to avoid, that the pool noodle will slip out of the worbla or that the expanding foam will break in case of the weight.
Please NOTE: The pool noodle is very sensitive to the heat and will shrink directly in contact! You have to work very fast with the heated worbla, there´s no chance to re-heat it later!
I drew the roughly shape I had in my mind on a paper (I also checked some fox photos, that is why the tail turned out so big at the first try, look yourselves, their tail is almost as big as their whole body!), cut it out and checked the size in the mirror . There are plotter paper rolls available on the web for app. 15€ incl. shipping, with a height of 90cm and 25m on the roll. Really practically, also for pattern making.
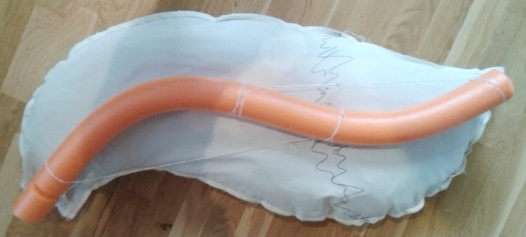
After that, I lay my shaped paper pattern on the ground (best big working space ever!) and flexed the pool noodle with the thick thread to an S-curve. My boyfriend Ben helped me out, pool noodles are very defensible ;-)! If the thread runs out of the shape doesn´t matter, when the expanding foam is all around, we don´t need this thread anymore and will cut it off, because the pool noodle will keep the shape in the foam itself. Everything of the pool noodle, which is too long on the top, can be cutted away!
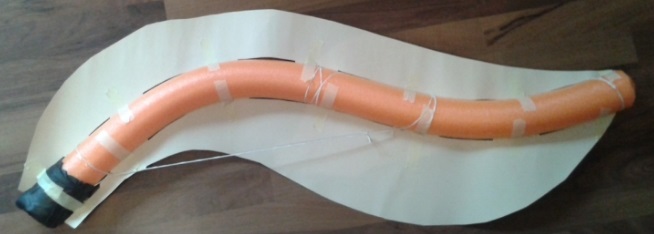
Afterwards you need two pieces of cardboard with the shape of the tail, which you can tape in the upper and lower centre line of the pool noodle. That is to calculate the amount of expanding foam you will need and it´s much easier to apply. I taped the cardboard on with masking tape.
Expanding foam party!!! Now we spray on the foam. I used way too much of it (app. three xxl cans 750ml + two normal cans), but I think that three or four normal cans would be enough for this size if you handle it well (costs: 5-10€ per can, depends on the company. On ebay you get three or five packs a bit cheaper). Spay it on equally on both sides. The final shape is your decision, I often make “the more the better” and cut off the excess later. You can also add more volume later, so it´s no problem if you want to change the shape or cut off too wild :-). So it´s smart to keep a rest or get an extra can to fill some holes in the surface. I leave all drying for one night. Tip: If you have a water mister, you can speed up the process of the foam expanding while spray water on the foam!
Note: Pls use a respirator and gloves and open up the window or work outside if possible, because expanding foam is highly carcinogenic!
Now the fight with the foam starts! Get your knives and give the tail a nice symmetric shape. Use the cardboard and the tip of the pool noodle as clues. When you knife touch them, you will notice it. If you don´t have a sense for proportion you can also add cardboard on the sides before adding the foam. Put on some old clothes, the foam will stick everywhere on you (electrostatic charge). Be smart and keep your trash bag and hoover close to you, to avoid the spreading of the foam piece all over the flat!
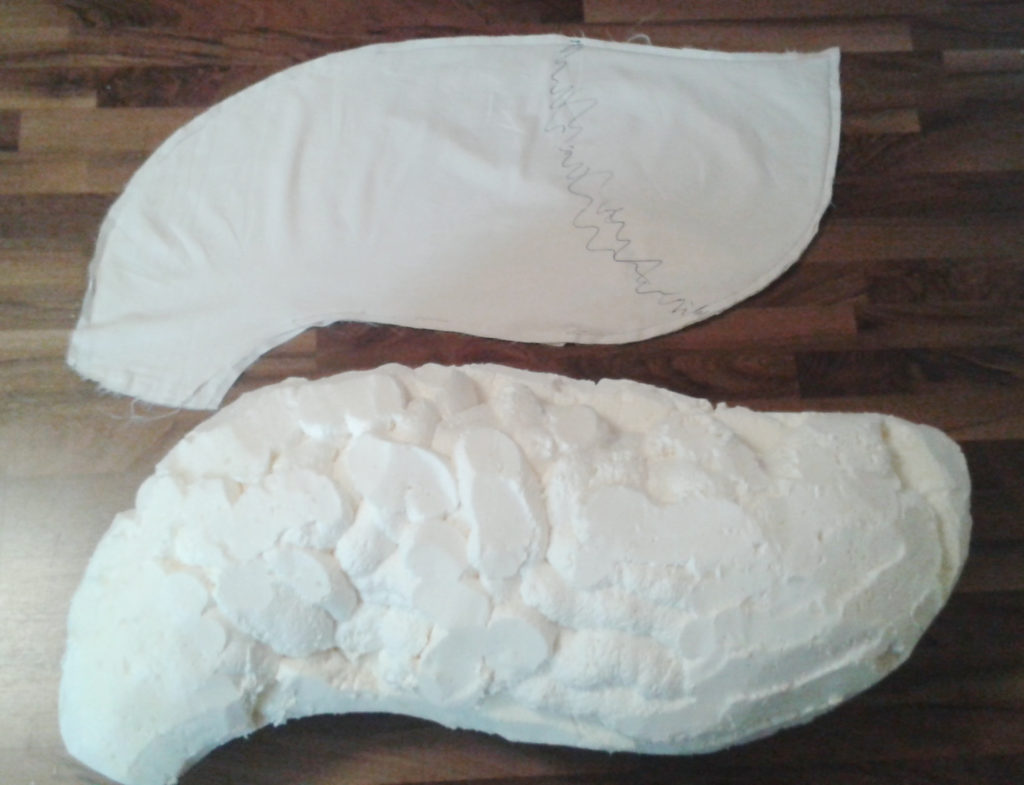
First round of the “expanding foam fight” – shape okay, but muuuuch to big!

Second round of the “expanding foam fight” – better! It fits into the cover.
The base sketch of the shape is a good clue for the size you go for, but because we have a 3D tail and not a 2D sketch, the tail has to be smaller than the sketch!
You can also use the sketch as pattern for the fur, or re-check it with the tail. Lay the tail on the sketch and redraw it generous. I recommend to make the first try out of a cheap fabric (Ikea have one that costs 2€/m) and give it a loooot of seam allowance (3-4cm), because it is not possible, that the pattern will fit on the first try.
Thereafter, the fabric has to be pinned from the tip, app. 10-15cm will be okay. Pull the fabric over the tip of the tail and correct your pins in width. Now it´s clear why we need so much seam allowance, the tail has a lot of volume and you have to pin the needle on the upper and lower center of the tail as close as possible to the shape. Mark the line of the pins with a pen and draw on the dividing line for the white tip. That line should be softly curved, that will look more natural and it´s easy to sew. Now you have a perfect pattern you can transfer on your paper (think about to separate the tip part from the lower part!) with a seam allowance of 2cm all around. It would be good to have a bit more seam allowance on the edge, where the tail will be screwn on (the worbla part), so you can easily hide it later. The pattern shows you now, how much fabric you need.
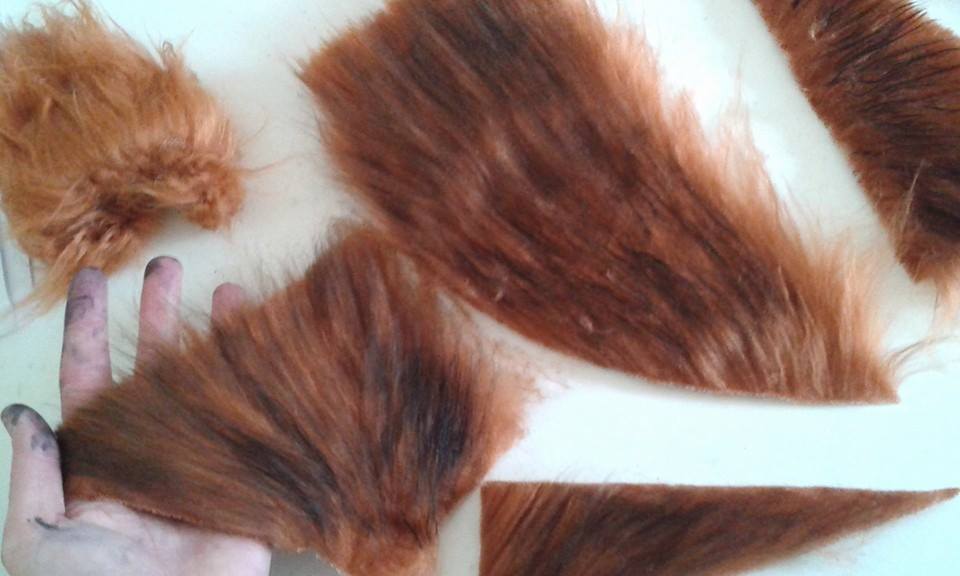
NOTE: fur normally has a grainline and the hair of a fox tail runs to the tip of the tail. You have to cut out all pattern pieces with the hair laying to the right direction (mark a dart, in which way your fur has to run!).
Now you have to cut out the fur (caution, you will be covered with hair after that!). I bought mine in a local fabric store for 7€/m in white and orange brown (yes, I bought the cheapest fur that I found!) and pimped the color later to get a more natural look.At this point you could think about a non-durable option and work in a zipper or Velcro, if you want to change the cover. I closed the lower center seam with a handstich with matching yarn.
First sew together each tip and bottom part and then close the upper center seam completely and the lower center seam app. 15-20cm. You need the mouth to pull the fabric over the tail.
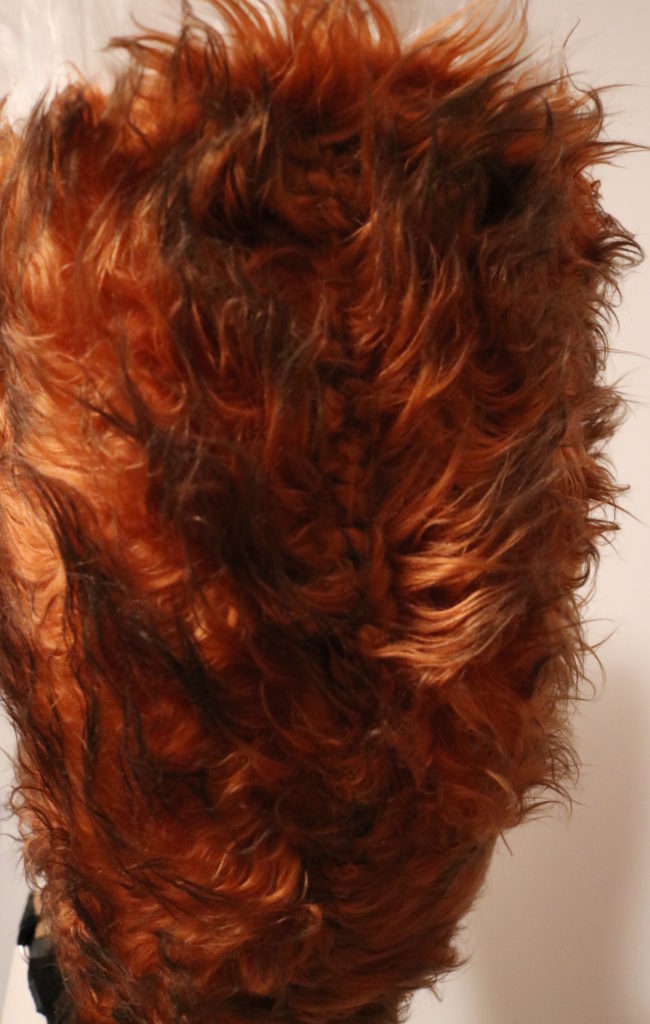
Use the handle of a stalk comb to pull out the fur from the seams and brush the fur at the seam areas carefully to cover them. We have a nice blending between the orange and the white part now, because the seam has a much softer optic now. The overlapping fur at the worbla base can be glued over the edge.
hand stitched centre back seam

seam blending
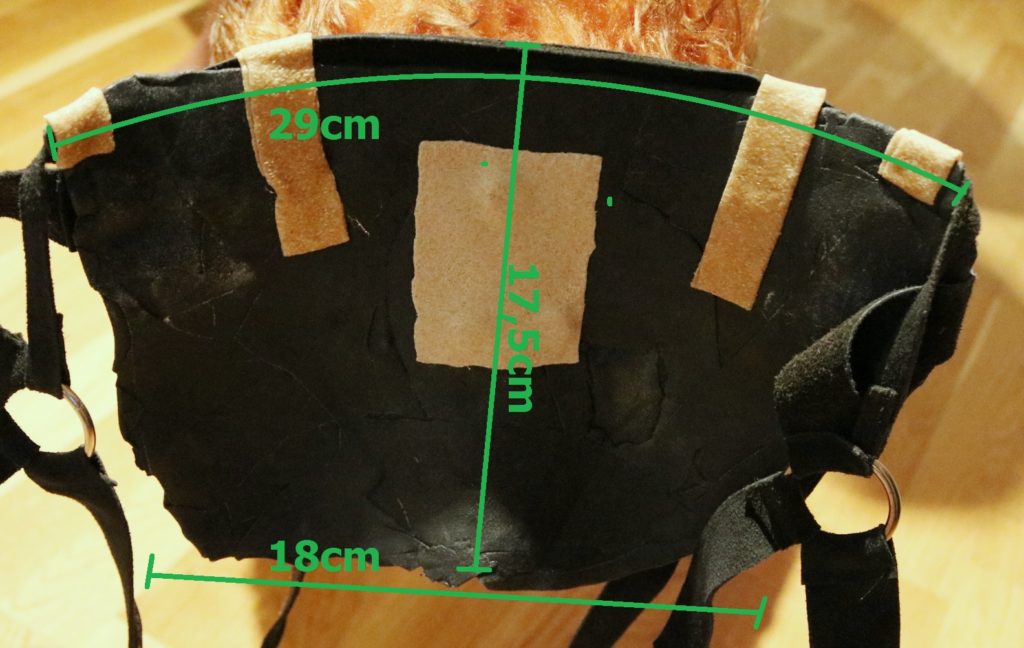
shaped butt plate
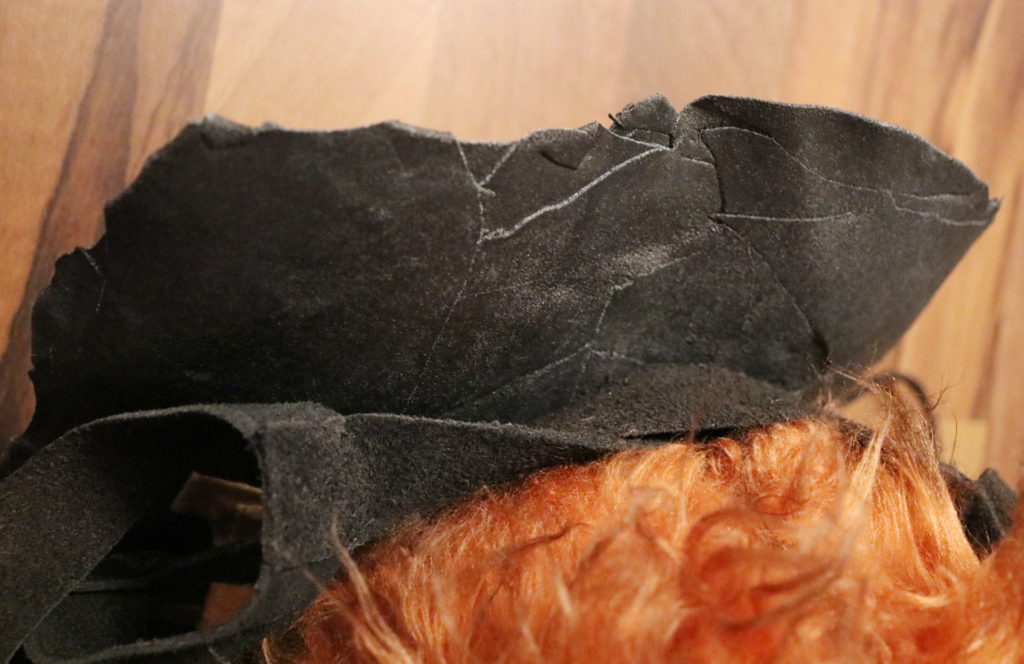
After that, we need more worbla leftovers for a butt plate. This plate shouldn´t be too thin to avoid breaks after screw in the screws. My base is 29cm x 17,5cm, and I curved all edges. Heat up your worbla and shape it on your butt. Think of the correct position! The tail should be positioned centered on the plate and anatomical it lays on the tailbone, so there will only be app. 10cm of your butt crack shaped, the rest of the plate lays on the back!

overlapping fur is blended over the edge of the tail
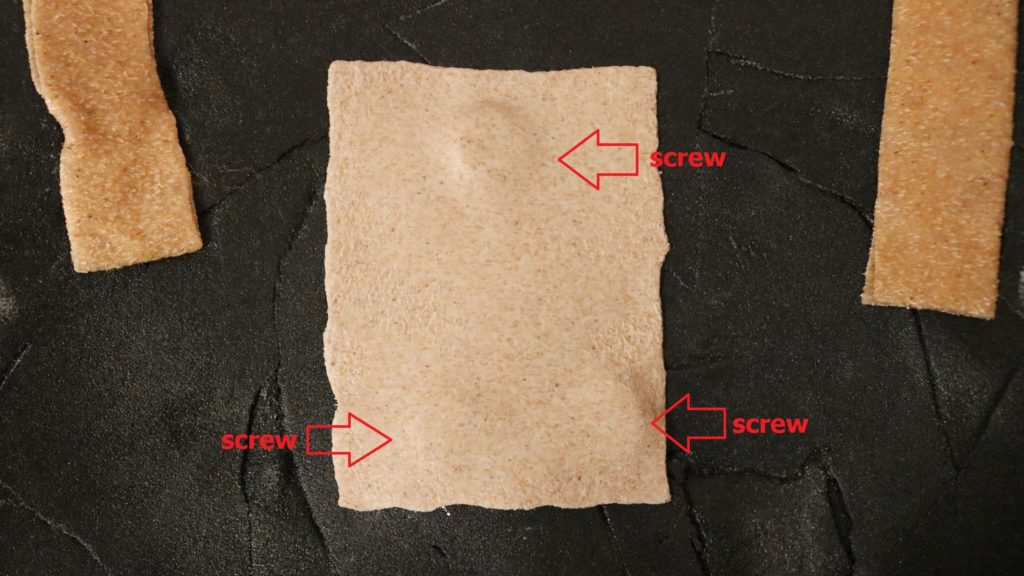
When the plate has the correct shape, you have to mark the correct position of your tail and then screw 3 or 4 screws (4-6cm length each, 6mm diameter) through the plate into the worbla part of the tail and the pool noodle. Mine was very stable than! Take care not to overtighten the screws, otherwise they will lose their grip! The heads of the screws should lay flat on the inside of the plate and covered by a strap of worbla (because of sharp edges and nickel allergy!). If you´re a softy, you could glue in some 3mm foam, but it´s not necessary, I wear mine all day long on a conventions and have no problems.
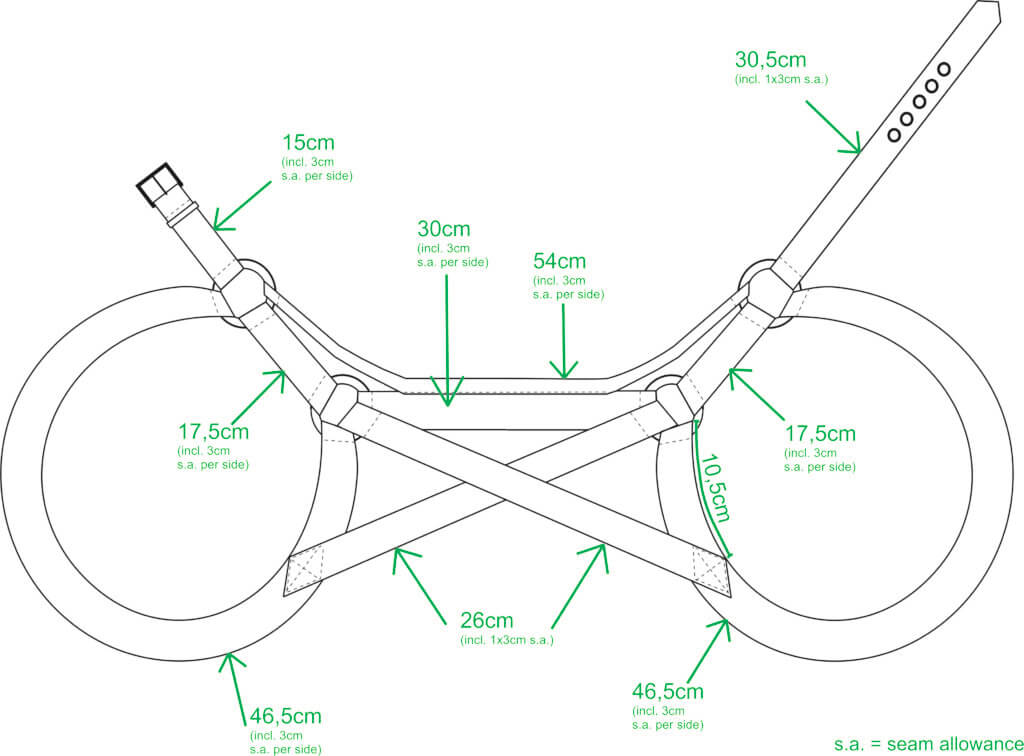
To get the plate stay close to the body, we need a harness, equal to the ones when you´re skydiving or climbing. One strap for each thigh and one for the hip/waist. The buckle is at front. I used real leather, because I had leftovers and because it´s tough and comfortable (no rubbing!).
The measures are really personal, I have size 36/S, see the measurements below in the sketch. You can also find the photos below, how to position the harness on the body and butt plate.
And YES it will take time to get the correct positions for the straps with various try ons, but it´s worth it! When you found the perfect positions for the straps, than fix them with some small straps of worbla on the plate (maybe someone can help you or you use gaffer tape to fix them temporary, take it off and make the worbla thing 😉 ), that is necessary to keep your nerves together on a convention, once the straps are fixed, nothing can slip away! It takes me a while to understand, that I have to fix the straps on the plate and during this, I had a loooong fight with these damned straps, because they DON`T want to stay in Position!

front view of the harness

side view of the harness

back view of the harness
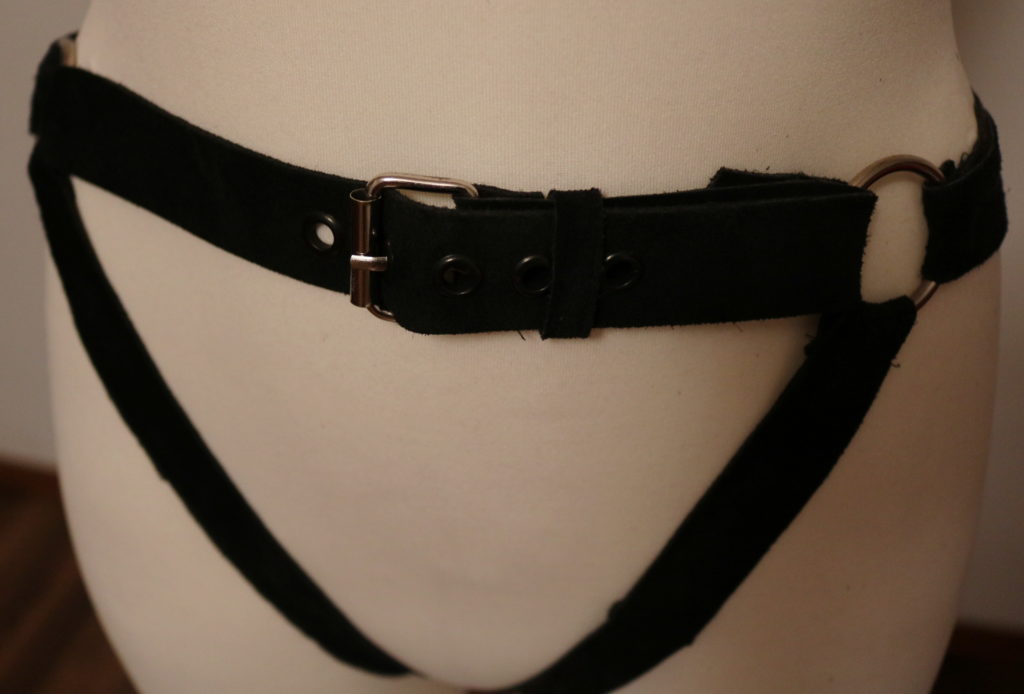
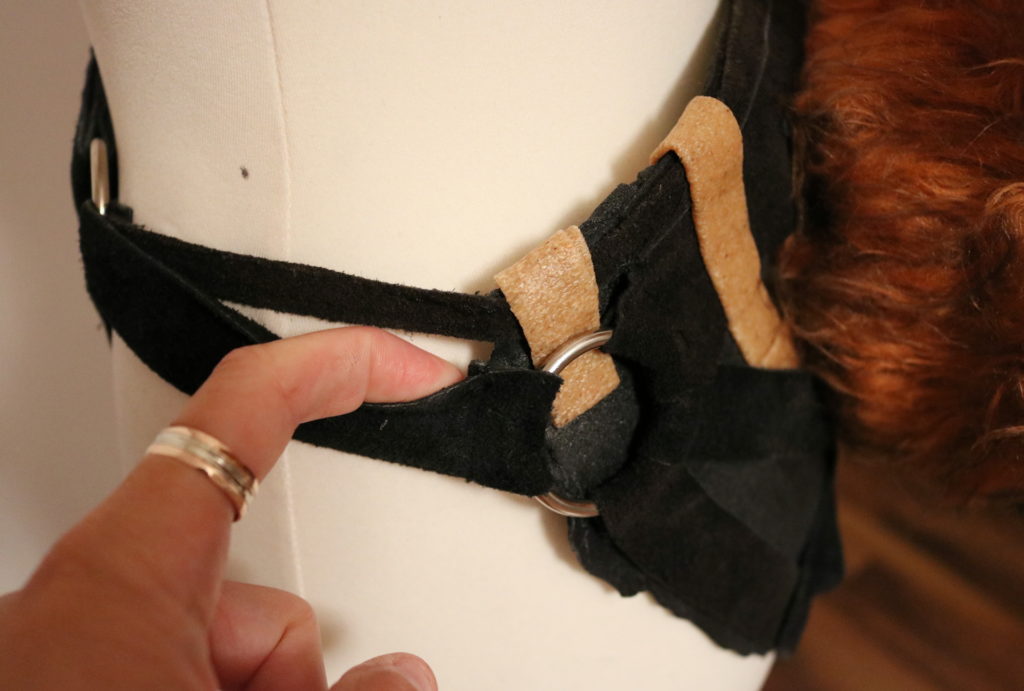
front Detail – clasp

harness – front straps details
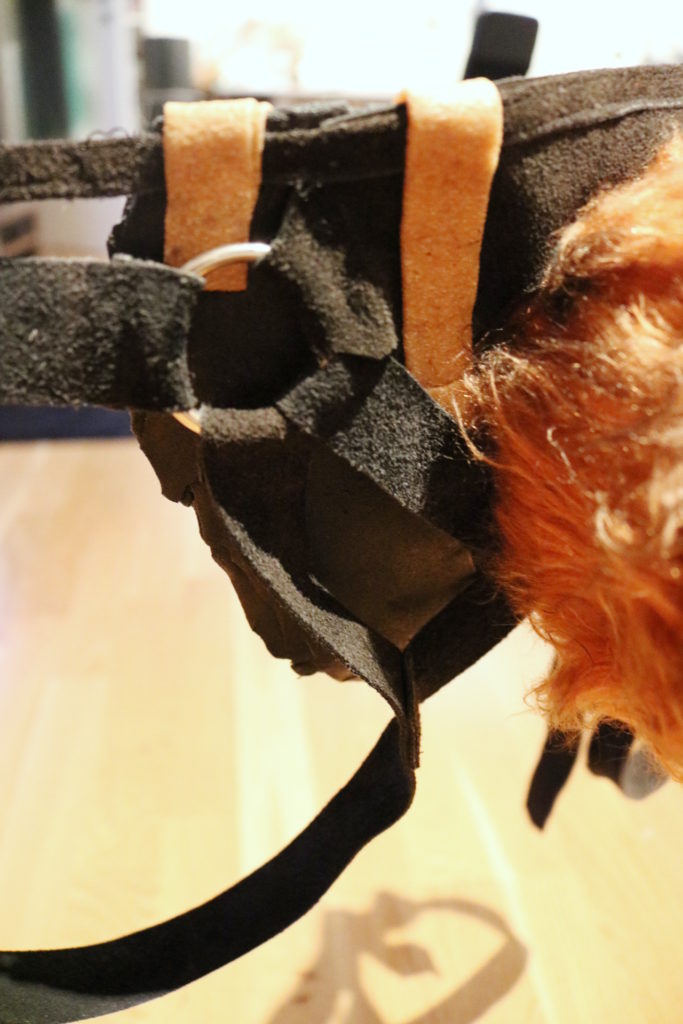
harness – strap ring
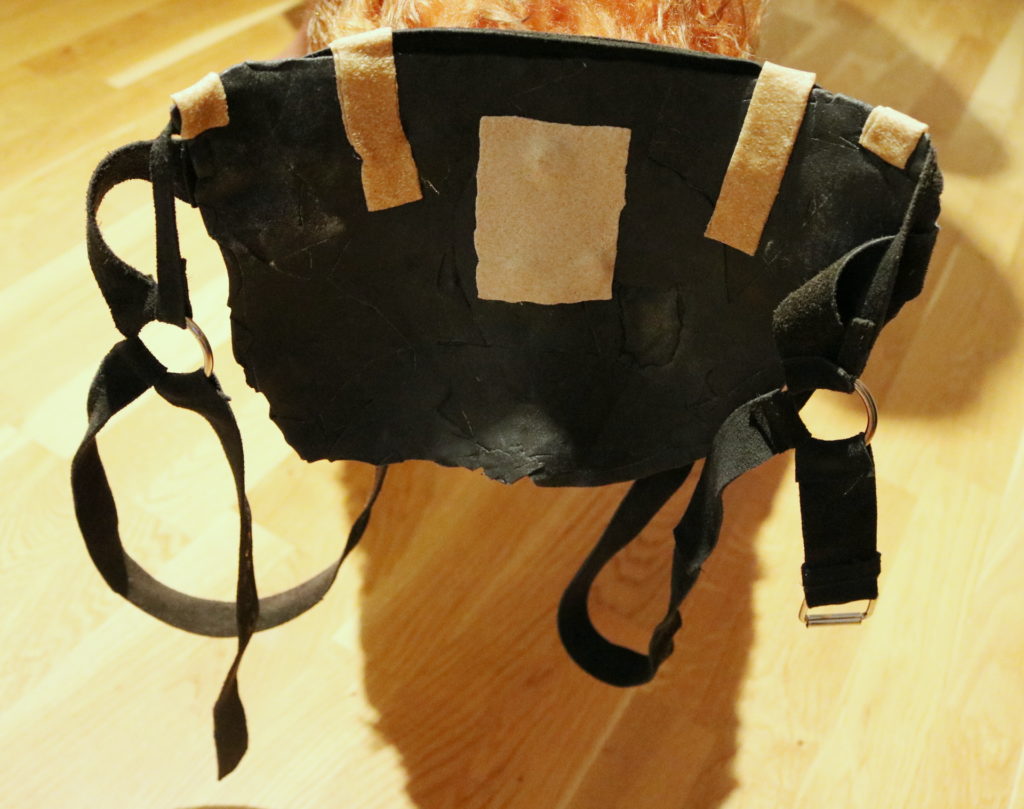
butt plate – inside view
harness – side straps details
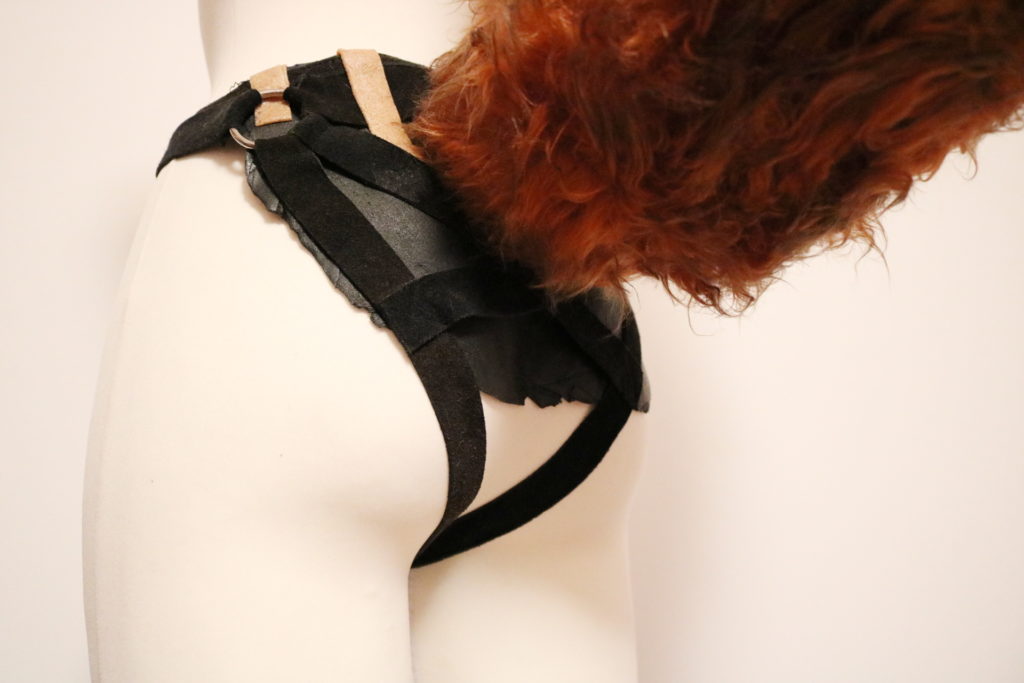
harness – back fit & straps details
Jump in your harness and *weeeeeeeh* waggle with your tail :-)!
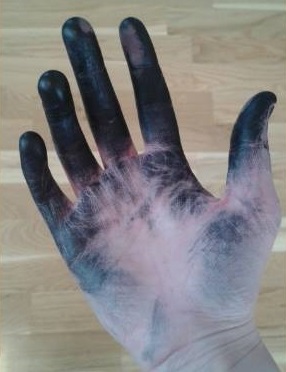
If you want to, you can make your fur more realistic now. I thinned black acryl paint a bit with water, spread it over my palm (reeeeaaaally smart without gloves, I will never learn it!) and then stroke it equally over the fur tips. I tried various methods on leftovers before to find the best: brush, cloth, sponge, Kleenex, but the best try were my hands. Take care, do not mess your white fur!!

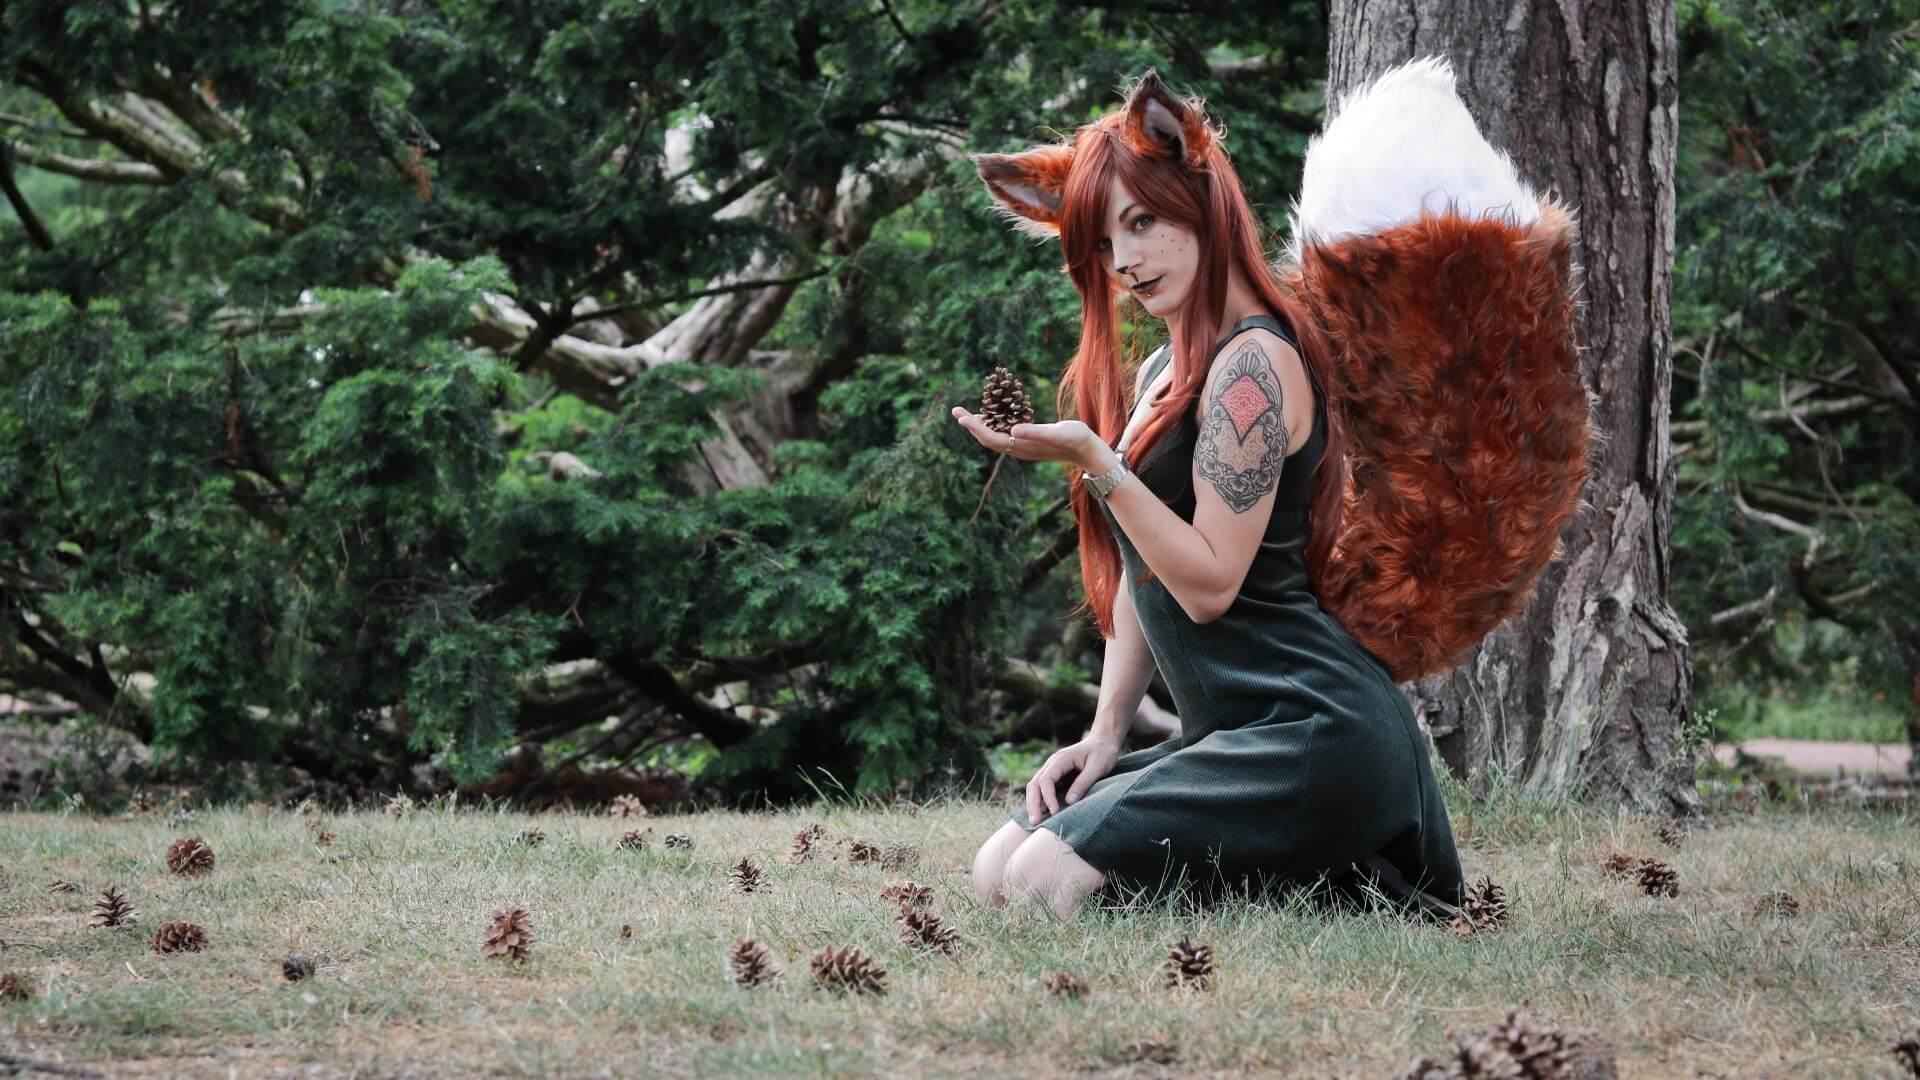
Now you only have to make yourselves a matching garment and ears :D!
Have fun!!!
No Comments